A Powershell GUI for staging computers
This is a tool that i created in the spring of this year (2018) but will be used a lot in the upcoming weeks.
The goal of the tool was to make the process of staging a computer a faster and more reliable process.
The GUI is made with Powershell Studio 2018 v.
In AD we create a computer-object , give it a name and a description.
The description consists out of the owners name and the department he/she works for.
Note : This system can only work when your AD is up-to-date and well maintained.
This also means that all our users have a Description and\or department value. (the tool catches the cases where this is not the case but you get the idea)
In the past we did this all by hand but when done by different people it tends to get messy. Some use caps where others do not, some start with the first name others with the last name, … .
After the creation of the computer, we would manually re-enter those values into a software to create a label to attach to the computer. Since we have to get +- 250 laptops unrolled in max 3-4 weeks time, i needed a faster more precise way.
The GUI
I created a small “staging-tool” that creates a computer-object in AD by simply selecting 3 values from a GUI:
- a users name
- a computer-name
- a computer-group to which the device will belong to.
The names of the computer-groups match the existing departments within the firm.
Before i explain how it works, this is how it looks like (please excuse the heavy redaction of data in the pictures) :
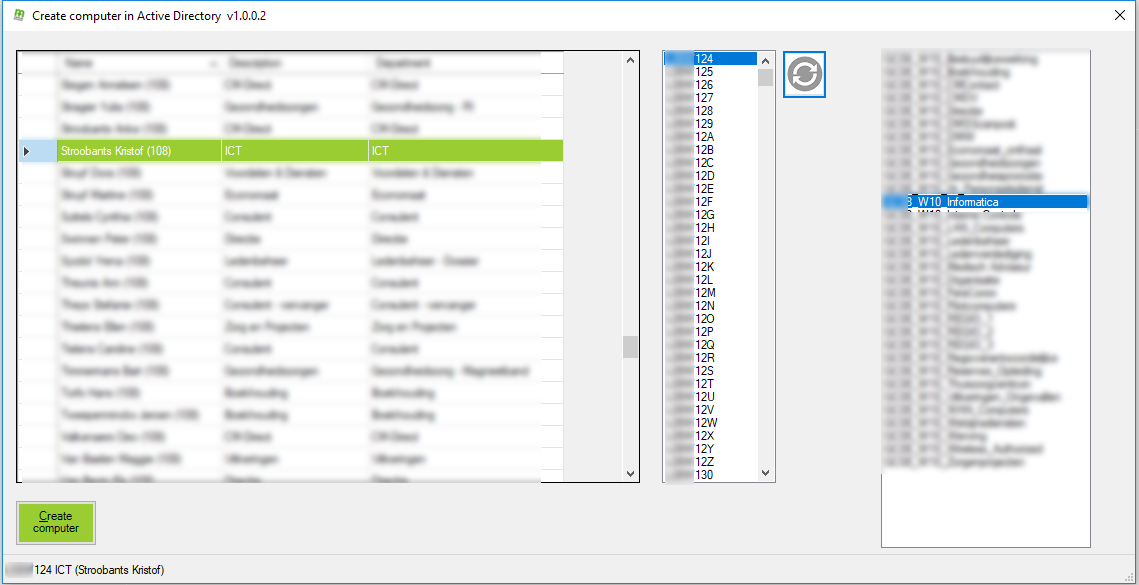
On the left-hand-side, all existing users in our OU are listed in a gridview. First, you select the user for whom you are creating the laptop, AKA its new owner. It also shows the description and department per user. If a value exists for the Department, it will use that in the description of the computer. It will automatically convert it into a full CAPS description. This way all computer-descriptions will have the same appearance.
Next we have a function that checks AD for the existing computer-names and then generates all remaining, non-existing names within a chosen range.
With our chosen range we have a possibility of 1296 unique computer-names, so we are future proof.
Each time you press the “Create computer”-button, the list automatically gets regenerated so that you’ll never have 2 objects with the same name.
The system automatically selects the first possible computer-name.
Our third and final value is over at the right-hand-side.
There you’ll see a list of all the computer-groups that exist in Active Directory.
These computer-groups are used by SCCM to deploy software to.
So in theory, when you create a new computer, the deployment of software all goes automatically.
I talked more in depth about this process in a post i made some time ago : Read more here
As a visual reference on the bottom of the application, you can always see the what object you’ll be creating.
Creating and printing a label
Once the computer has created the new computer-object, it will ask you whether or not you’d like to create a label.
When you press “YES” it will create a label via a Dymo label printer.
This is how that works:
With the Dymo software, you create a label, a template. On that label you can create several fields or values.
The software allows you to name these fields, give them a unique identifier if you will.
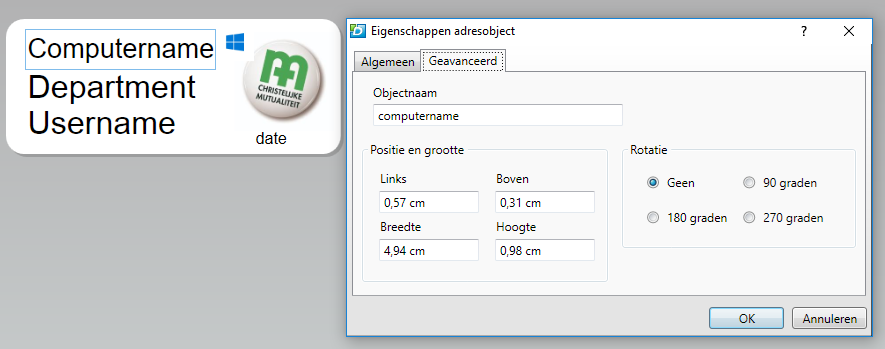
So on our label, you’ll have computer-name, department, user, date.
Once you’ve created that, you can save that label to a location of your choosing.
Then in Powershell you can use that label and its unique identifiers like so :
$msgBoxLabel = [System.Windows.MessageBox]::Show("Do you want to create a label $($listBox1.Text)

$($script:dienst) ($script:name)", 'Create Label', 'YesNo', 'question')

SWITCH ($msgBoxLabel)
{
'YES' {

[reflection.assembly]::LoadFile('C:\Program Files (x86)\DYMO\DYMO Label Software\Framework\.net4\DYMO.DLS.Runtime.dll')

[reflection.assembly]::LoadFile('C:\Program Files (x86)\DYMO\DYMO Label Software\Framework\.net4\DYMO.Label.Framework.dll')

[reflection.assembly]::LoadFile('C:\Program Files (x86)\DYMO\DYMO Label Software\Framework\.net4\DYMO.Common.dll')

$printername = [DYMO.Label.Framework.Framework]::GetLabelWriterPrinters() | select -ExpandProperty name

$labelfile = 'C:\whatever location you want\template.label'
$label = [Dymo.label.framework.label]::open($labelfile)
$label.SetObjectText("computername", $listbox1.Text)
$label.SetObjectText("department", $script:dienst)
$label.SetObjectText("user", $script:name)
$data = (get-date -f "MM-yyyy")
$label.SetObjectText("date", $data)
$label.Print($printername)
}
'NO' {
}
}
I found an example over at Reddit.
This will create a label that we attach to all computers and looks like this:
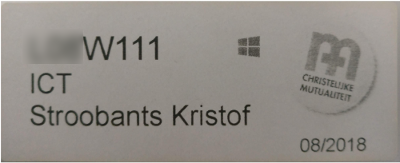
By using this tool we have limited the chances off human errors to a minimum and the process is a lot faster.
Handling credentials
One of the new things i tried with this project is Credential-handling. During the staging process, you often go away from the computer, need to oversee some other data or simply close the application often to then re-open it 10 minutes later.
Because we are dealing with AD, we need to open it as a user with sufficient rights. So upon opening the application, the tool will prompt you to type in those credentials. It will store them onto your hard drive. When you re-open the application, it will check to see how long ago it created that file.
If the file it less than 1 hour old, it will give you a notification that your credentials are still OK and you can carry on. If not, you’ll have to re-enter your credentials once more.
The credentials are stored in a encrypted XML format. The function looks like this:
#region credential handling
FUNCTION import-mycredential
{
# Re-create credential file if older than 1 hour, if not then use the stored credentials.
IF (Test-Path -Path "$env:APPDATA\CreateADComputer")
{
$lsw = Get-Item "$env:APPDATA\CreateADComputer" | Select -ExpandProperty LastWriteTime
$date = get-date
IF (($date - $lsw).hours -gt 0)
{
#delete folder and recreate credentialsfile
Remove-Item "$env:APPDATA\CreateADComputer" -Recurse -Force -ErrorAction SilentlyContinue -Confirm:$false
New-Item -Path "$env:APPDATA\CreateADComputer" -ItemType "directory" -Force
$script:credential = Get-Credential
$script:credential | Export-CliXml -Path "$env:APPDATA\CreateADComputer\cred.xml"
$script:credential = Import-CliXml -Path "$env:APPDATA\CreateADComputer\cred.xml"
}
ELSE
{
$script:credential = Import-CliXml -Path "$env:APPDATA\CreateADComputer\cred.xml"
$msgBoxInput = [System.Windows.MessageBox]::Show("Careful maty, you last opend this program with administrative priveliges on $lsw!", 'ADM-account is being used', 'OK', 'info')
}
}
ELSE
{
New-Item -Path "$env:APPDATA\CreateADComputer" -ItemType "directory" -Force
$script:credential = Get-Credential
$script:credential | Export-CliXml -Path "$env:APPDATA\CreateADComputer\cred.xml"
$script:credential = Import-CliXml -Path "$env:APPDATA\CreateADComputer\cred.xml"
}
}
#endregion
Leave a Comment